How to photograph the Milky Way?
The Milky Way, our galaxy, offers a stunning celestial spectacle! However, photographing it requires good viewing conditions and appropriate settings on your camera or smartphone.
What is the Milky Way?
The Milky Way is a gigantic galaxy in which our solar system is located. It belongs to the category of
spiral galaxies . Our solar system is located in one of its arms called Orion, about 27,000 light-years from the center of the galaxy. The latter is home to a supermassive black hole named Sagittarius A , which was photographed for the first time by scientists on May 12, 2022 . Its mass is equivalent to 4 million times that of our sun !
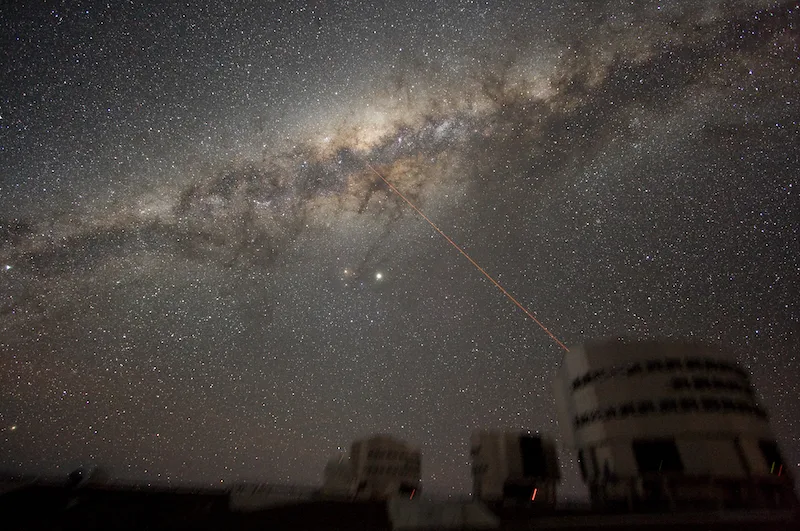
From an Earthly perspective, the sky we observe when looking towards the galactic center actually corresponds to the Milky Way seen from the inside . The arm we are in actually contains thousands of stars as well as numerous deep sky objects such as nebulae and star clusters. Capturing all these tiny points of light and every detail of our Milky Way requires specific techniques .

Whether you’re a professional photographer with high-end equipment or just a passionate amateur with a consumer camera, it’s possible to take magnificent photos of the Milky Way. Even with a smartphone, you can achieve surprising and striking results!
Conditions for observing and photographing the Milky Way
Good atmospheric conditions are essential for observing and photographing our starry sky.
How to find the Milky Way in the sky
The Milky Way is visible to the naked eye, but choosing the right time and place is essential to observe it clearly.
The Milky Way rises in the southeast, crosses the southern horizon, and then sets in the southwest. Therefore, it is best to choose an observing site where there are no major cities in that direction.
In summer, the Milky Way is located in the constellation of Sagittarius. To find this constellation, start by looking at the constellation of Ursa Minor.
Additionally, there are calendars specifically designed to show the position of the Milky Way based on your location and the day of the year.
The best time to observe the Milky Way
The best times to observe the Milky Way’s galactic center are generally between mid-March and mid-October . This is because while it’s technically possible to see part of the Milky Way at any time of year, if you take pictures between September and April, you’ll be limited to the darkest parts of the night sky, as the sun obscures the galaxy’s bright center.
What are the best conditions for observing the Milky Way?
Find a suitable site
For optimal viewing of the Milky Way, look for locations away from artificial light sources. National parks, rural areas, and mountain peaks often offer the darkest and clearest skies.
Escape the city
Even if the sky is very dark, a bright dome from a city can spoil the view if it is located to the south.
Light pollution from urban areas can make it difficult to see the Milky Way. Get out of the city and find remote locations with darker skies for a better viewing experience.
Fleeing the Moon
Moonlight can eclipse the stars of the Milky Way. Consult the lunar calendar and plan your outings for nights of a new moon or when the moon is in its thin crescent phase.
To find the Milky Way in the sky, move away from city lights, which can cause annoying light pollution. Choose moonless nights or nights when the Milky Way is in its crescent phase so its brightness isn’t too overwhelming.
Camera Settings for Photographing the Milky Way
Photographing the Milky Way requires manually adjusting three parameters: ISO, shutter speed, and aperture. In addition, you must turn off the flash, choose the best possible image quality, and focus manually.
Here are six steps to take to photograph the Milky Way with your phone:
- Choose a long exposure time
- Focus manually.
- The aperture set to maximum
- Set the ISO sensitivity to the lowest possible level
- Disable flash
- Take photos in RAW format
- Set the image quality to as high as possible
Choose a long exposure time
Because the light from the Milky Way is relatively soft and weak, you’ll need a very long exposure time , from
30 to 60 seconds. You can adjust this speed using the manual mode (also called pro mode or professional mode) in your smartphone’s camera app. On most devices, the maximum exposure time is 30 seconds. The longer the exposure time, the more light your camera will capture and the more of the Milky Way will be visible.
Manual focus
Another advantage of your camera’s Pro or Manual mode is manual focus adjustment. Otherwise, it would be impossible to focus on the Milky Way. It would simply be too far away. You can find manual focus (MF) in the camera’s Pro mode settings.
The opening
This is one of the most important parameters. The aperture corresponds to the size of the camera lens. It is referred to as the “F/D” ratio, where the smaller the D value (for example: f/3.5, f/2.8, or f/1.8, etc.), the more light will be collected.
If you have an f/1.4 or f/1.8 lens, start by opening it as wide as possible, then reduce the aperture by one or two stops if you feel you have enough light to do so. In any case, remember that the aperture should be as large as possible and therefore the F/D value should be as small as possible.
Set the ISO sensitivity as low as possible
Although you need a high ISO value, usually between 1600 and 3200, try to set it as low as possible. The higher the ISO value, the brighter the stars and lights in the Milky Way will be, but the more noise and unwanted pixels the image will contain.
Turn off the flash
While many novice photographers think flash is useful for night photography, it doesn’t work in astrophotography. So you need to turn off the flash. A cell phone flash only works on objects and people that are close to the lens. The Milky Way is too far away for the flash to affect it.
Take RAW images
RAW images give you more creative freedom when editing your photos. However, you’ll need to use large variations in brightness to create stunning Milky Way images, so set the image size to RAW in your phone’s Pro or Manual camera mode.
RAW images are unprocessed images that contain much more information about light, contrast, and color. Again, this is a mode you’ll find in the PRO mode of your smartphone or camera.
Set the image quality to the highest possible level
Set the image size and quality to the highest possible level. You’ll find options in your camera app settings.
The shot
We recommend using a tripod to avoid blurring when shooting long exposures. Also, use a remote control or self-timer to trigger the camera without physically touching the camera.
Example setting for PRO mode on your smartphone
Here’s a simple setting for PRO mode on your smartphone or camera:
- Lens focal length: 18 mm
- Aperture: F/3.5
- Exposure time: 20 seconds
- ISO sensitivity: 1600 ISO
With these settings, you should have perfectly decent first shots.
By following these viewing conditions and adjusting your camera settings, you’ll be ready to capture breathtaking images of the Milky Way!
Some additional tips to make this experience unforgettable
1. Bring a recliner
A portable chair that you can lie down in is a great way to enhance the experience. You can sit back, relax, and gaze at the sky comfortably. Without it, your neck will get a little stiff after a while.
2. Bring binoculars or a telescope
Any pair of binoculars will open your eyes when observing the Milky Way. With the naked eye, you’ll see a good number of stars, along with that milky glow, but look through binoculars or through the eyepiece of a telescope and you’ll begin to see countless individual stars hiding in the glow.
3. Bring a blanket or jacket
Even in summer, it can get quite cold on clear nights. Bring a jacket or a nice blanket to keep you from getting too cold while you stargaze. You’ll be very glad you did.