Polar Alignment of Your Telescope in 4 Steps!
Behind this technical term lies a simple adjustment that will allow you to maximize your telescope’s potential with an equatorial mount. This method, broken down into 4 steps, is ideal for beginners and will enable you to perform quick polar alignment of your instrument.
What is Telescope Polar Alignment?
La mise en station consiste à aligner la monture d’un télescope avec l’axe de rotation de la Terre. Sur les montures équatoriales, ce réglage est obligatoire. Grâce à cette manipulation, vous compenserez alors le mouvement de rotation terrestre et vous pourrez suivre plus facilement la trajectoire des astres dans le ciel étoilé.
Polar alignment consists of aligning a telescope’s mount with Earth’s rotation axis. On equatorial mounts, this adjustment is mandatory. Thanks to this manipulation, you’ll compensate for Earth’s rotational movement and be able to more easily track celestial objects’ trajectories across the starry sky.
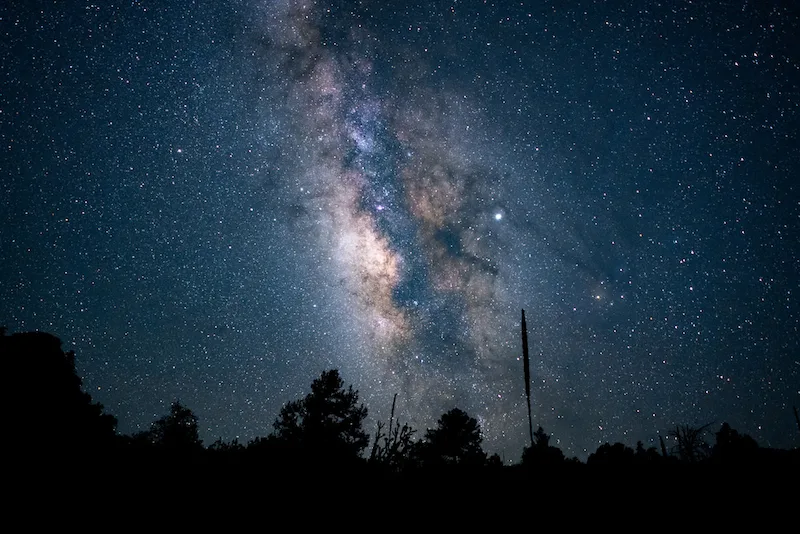
Indeed, we won’t teach anyone anything new here, but Earth completes one rotation on itself in 24 hours. Thus, celestial bodies like planets, our Sun, or the Moon move across the sky primarily because our Earth rotates on itself and we rotate with it. The video below will help you visualize this terrestrial movement.
When you start observing the sky through a telescope, you’ll quickly notice Earth’s rotation speed (and consequently the speed at which celestial objects move). You’ll see—they tend to exit your eyepiece’s field of view very quickly!
This is the whole point of proper polar alignment: tracking stars, deep-sky objects, or planets across the celestial vault with complete peace of mind.
Step 1: Tripod Installation
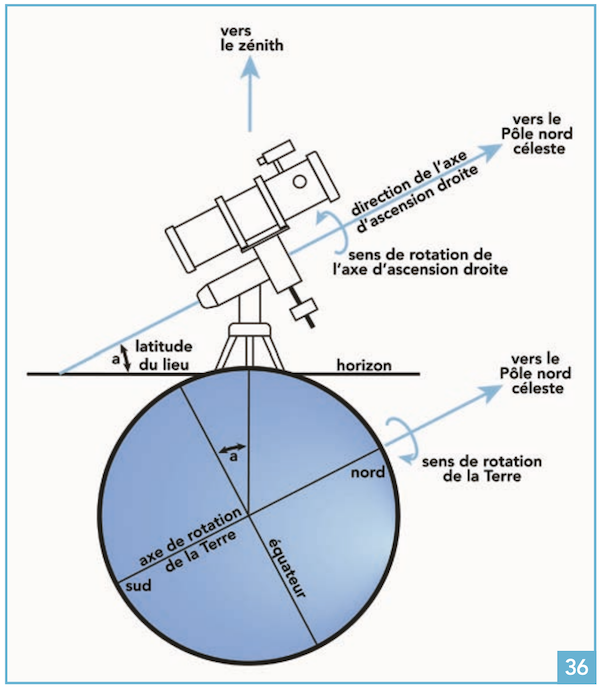
Here, we’ll simply ensure that the equatorial mount’s tripod is well-stabilized and correctly positioned horizontally. If your tripod isn’t parallel to the ground, this will affect your sky observation (see diagram below).
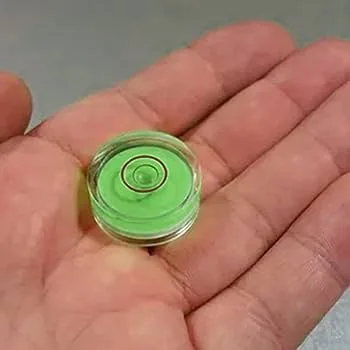
To do this, we’ll use a circular bubble level. Place the bubble level at each leg’s location, then adjust their position using the screws located on them until the bubble is positioned at the level’s center.
Step 2: Telescope Mount Installation
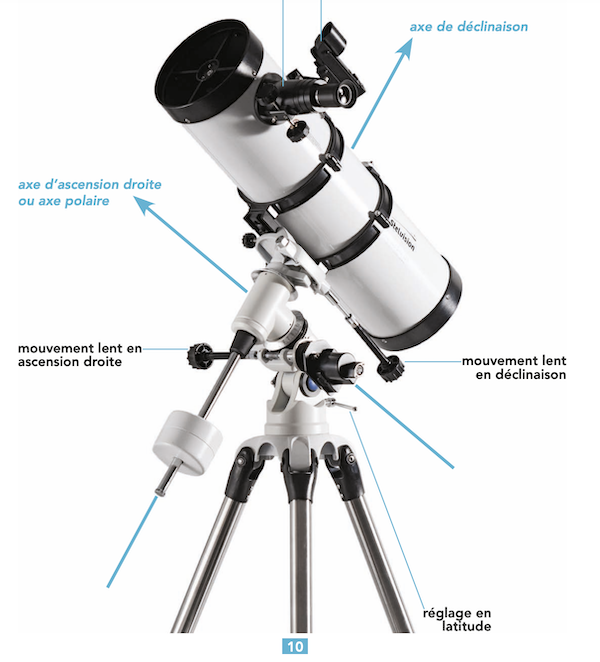
We can now place the equatorial mount on the tripod, then attach the tube to the mount. Ensure that the tube and declination axis are perfectly aligned and parallel to your mount’s right ascension axis (or polar axis) (see image below).
Step 3: Adjust Your Mount’s Latitude
Once the telescope is mounted, we’ll now adjust the latitude according to your location. You can find this information anywhere on the internet, on Google Maps for example.
For example: Paris is at 48°, Toulouse at 43°, Ajaccio at 42°.
You’ll then report this latitude on the telescope’s latitude graduation using the screw located on the instrument’s side (see diagram above).
Step 4: Orient the Right Ascension Axis Toward North
The 4th step consists of orienting your telescope toward North using a compass. Unscrew the azimuth axis (the screw located below your mount) and rotate your telescope toward North. Remember to properly retighten the azimuth axis once the instrument is correctly oriented.
If steps 3 and 4 have been correctly followed, your telescope tube should now be pointed toward Polaris, located in the Little Dipper constellation. Indeed, Polaris or the Pole Star is called this because it’s located near the celestial north pole!
And there you have it—your telescope’s polar alignment is complete, you can now observe stars with complete peace of mind!
Starting Observation
From now on, only the right ascension and declination axes should move. To orient the tube toward objects you wish to observe, simply unscrew the screws corresponding to these two axes and aim at the celestial body using your finder.
Once the celestial body is in your field of view, lock these two axes’ screws. Indeed, once you have the desired sky object in your viewfinder, you’ll only need to turn the right ascension axis handle to keep the celestial body centered in your eyepiece.
The method we’ve presented is called “approximate” polar alignment, ideal for beginners. It will be largely sufficient for astronomical observations and discovering Saturn, for example. It’s also the most appropriate method if you don’t have direct visual access to the pole star or if you simply don’t know how to spot it in the sky! 🙂
For astrophotography, however, you’ll need to use more advanced polar alignment methods.
We hope this article has helped clarify your telescope’s adjustment process. If you’re looking to introduce children to astronomy in a fun and accessible way, don’t forget to check out our selection of star light projectors that can bring the wonders of the night sky right into their bedroom!